Installing a GDPR-compliant cookie consent banner with Google Tag Manager offers numerous advantages for website administrators and marketers seeking to enhance user privacy compliance while streamlining their website management processes.
In this article, we'll give you a step-by-step overview of integrating Google Tag Manager with Enzuzo's cookie consent tool, helping you efficiently deploy and control the cookie consent script without requiring direct code modifications.
This approach simplifies the implementation process and provides the flexibility to manage and update your cookie banner dynamically, ensuring compliance with evolving privacy regulations while maintaining a seamless user experience.
👉 Enzuzo's free, no-code tool makes setting up a cookie consent banner on any platform easy. Try it out today.
This guide assumes that you have Google Tag Manager set up on your website. If you do not, follow this guide from Google before beginning.
To load the Enzuzo cookie manager via Google Tag Manager, follow these steps::
Install the Enzuzo Community Template
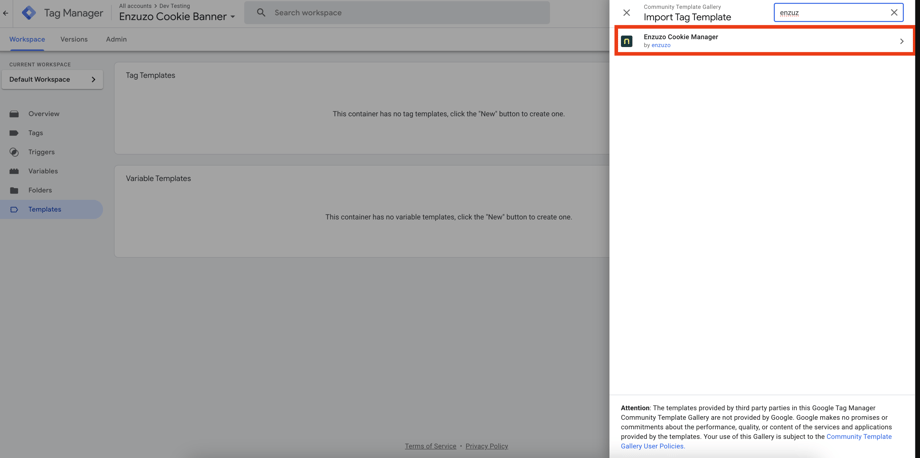
1. Go to the "Templates" section of your Google Tag Manager workspace, and click "Search Gallery".

2. Select the "Enzuzo Cookie Manager" template from the list.
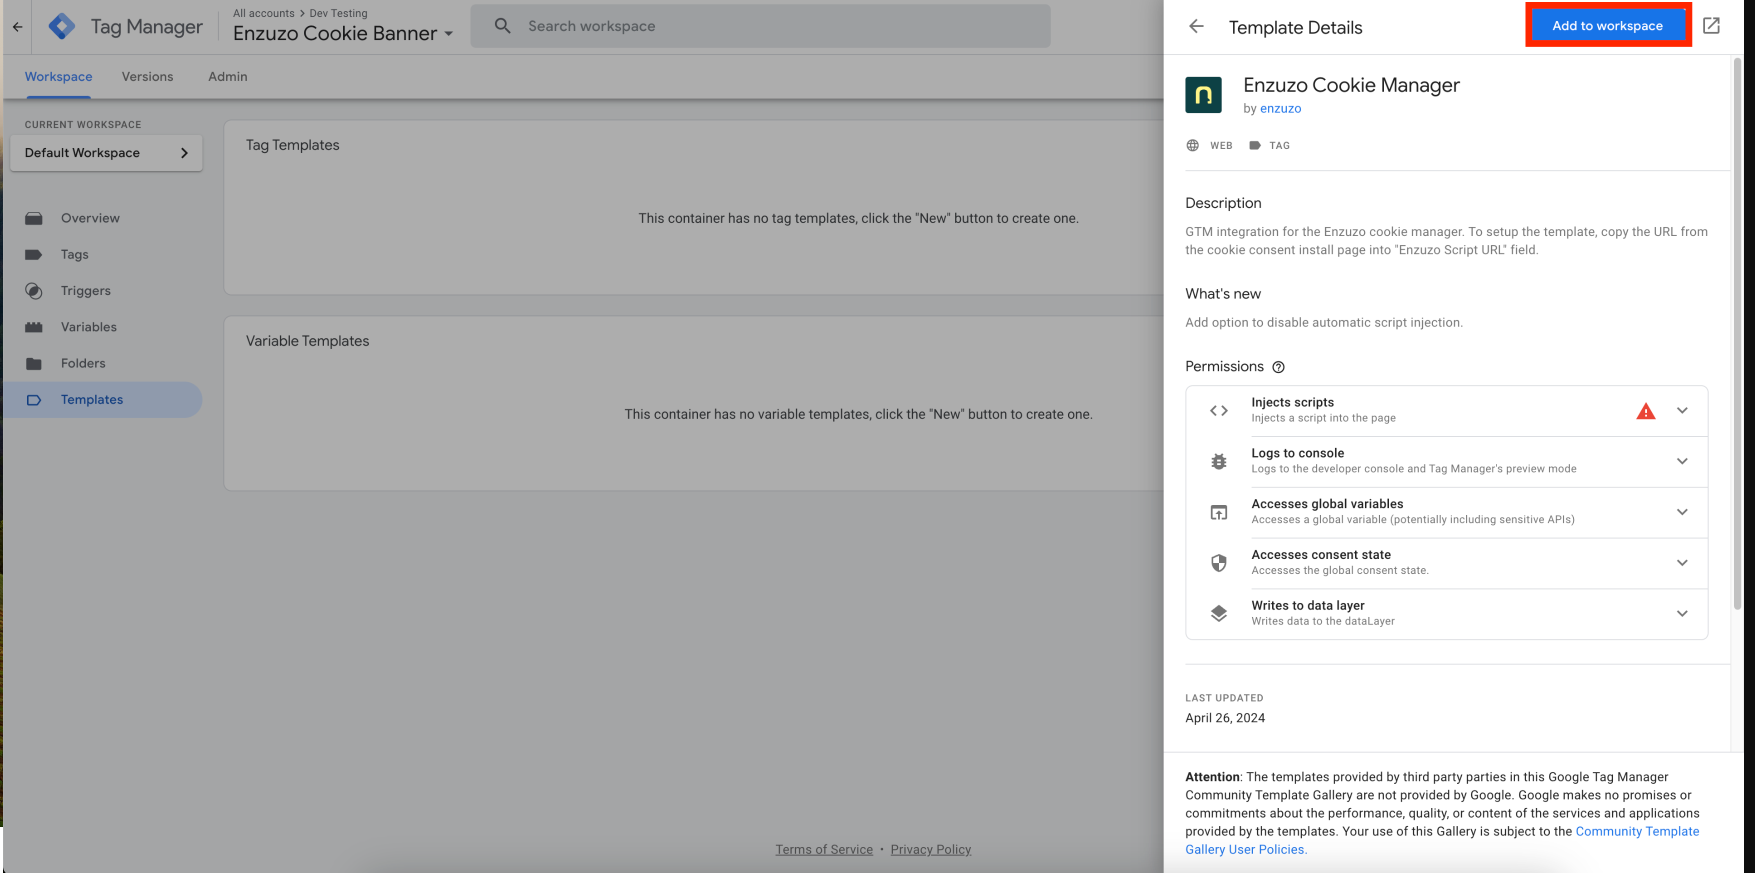
3. Click "Add To Workspace"
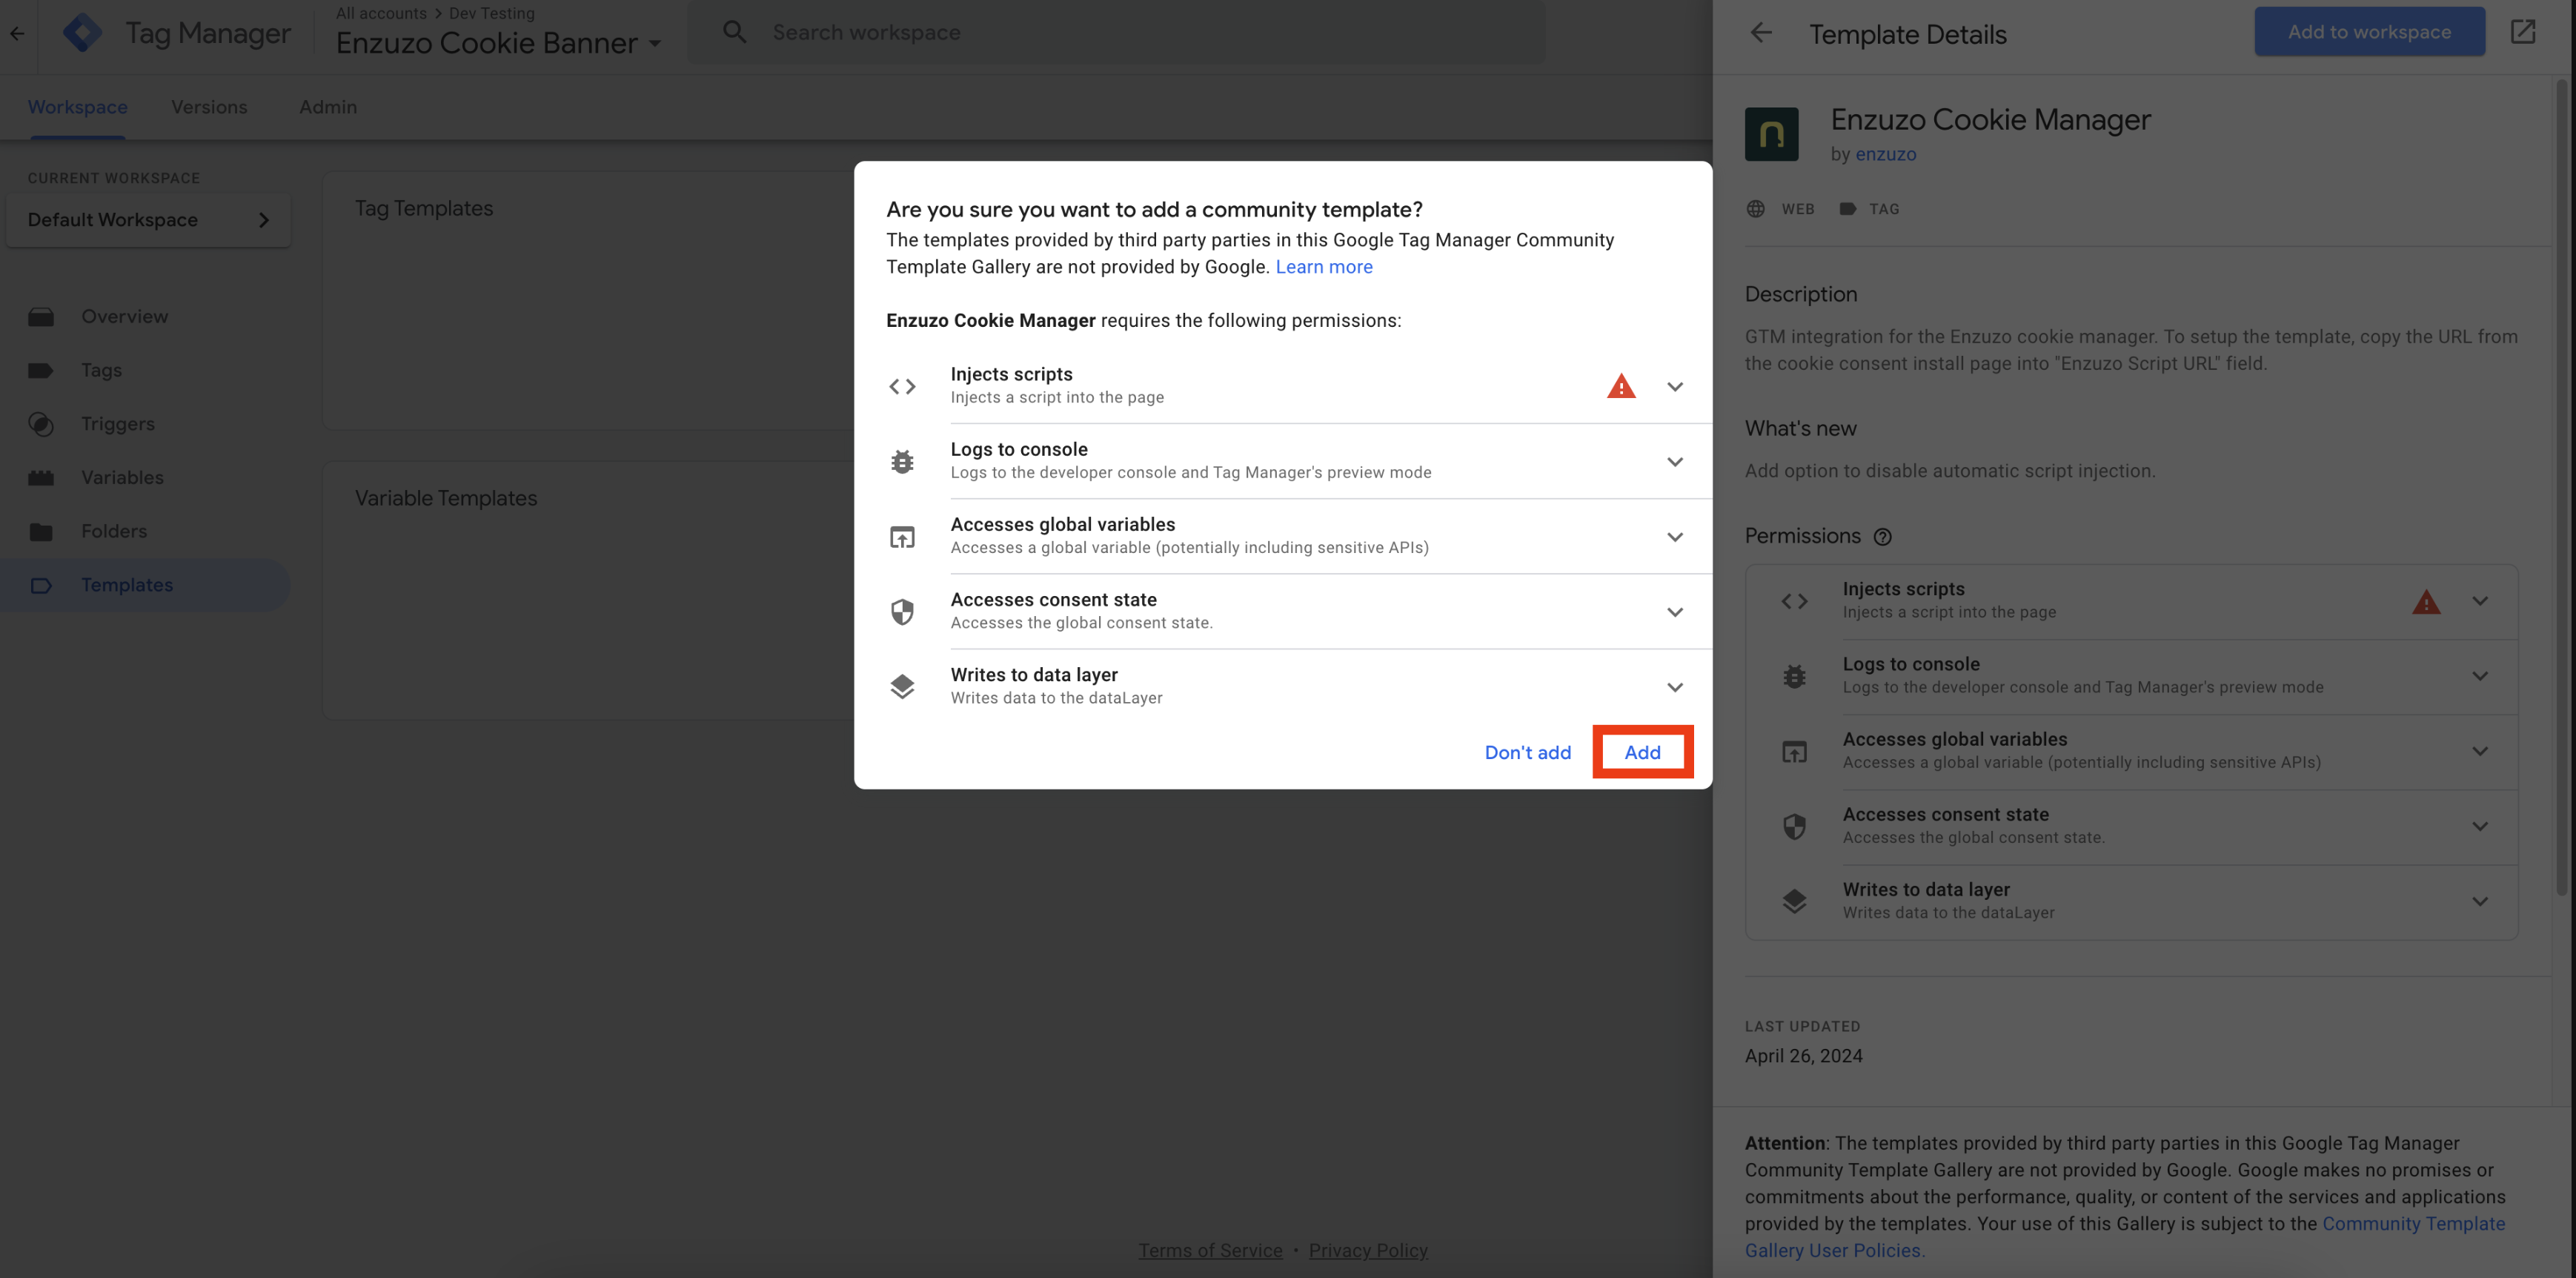
4. Press "Add" on the dialog to add the template to your workspace.
Create the Enzuzo Cookie Manager Tag
1. Go to "Tags" and click "New".

2. Give a tag a descriptive name, select the "Enzuzo Cookie Manager" for the tag type, and set the trigger to "Consent Initialized".
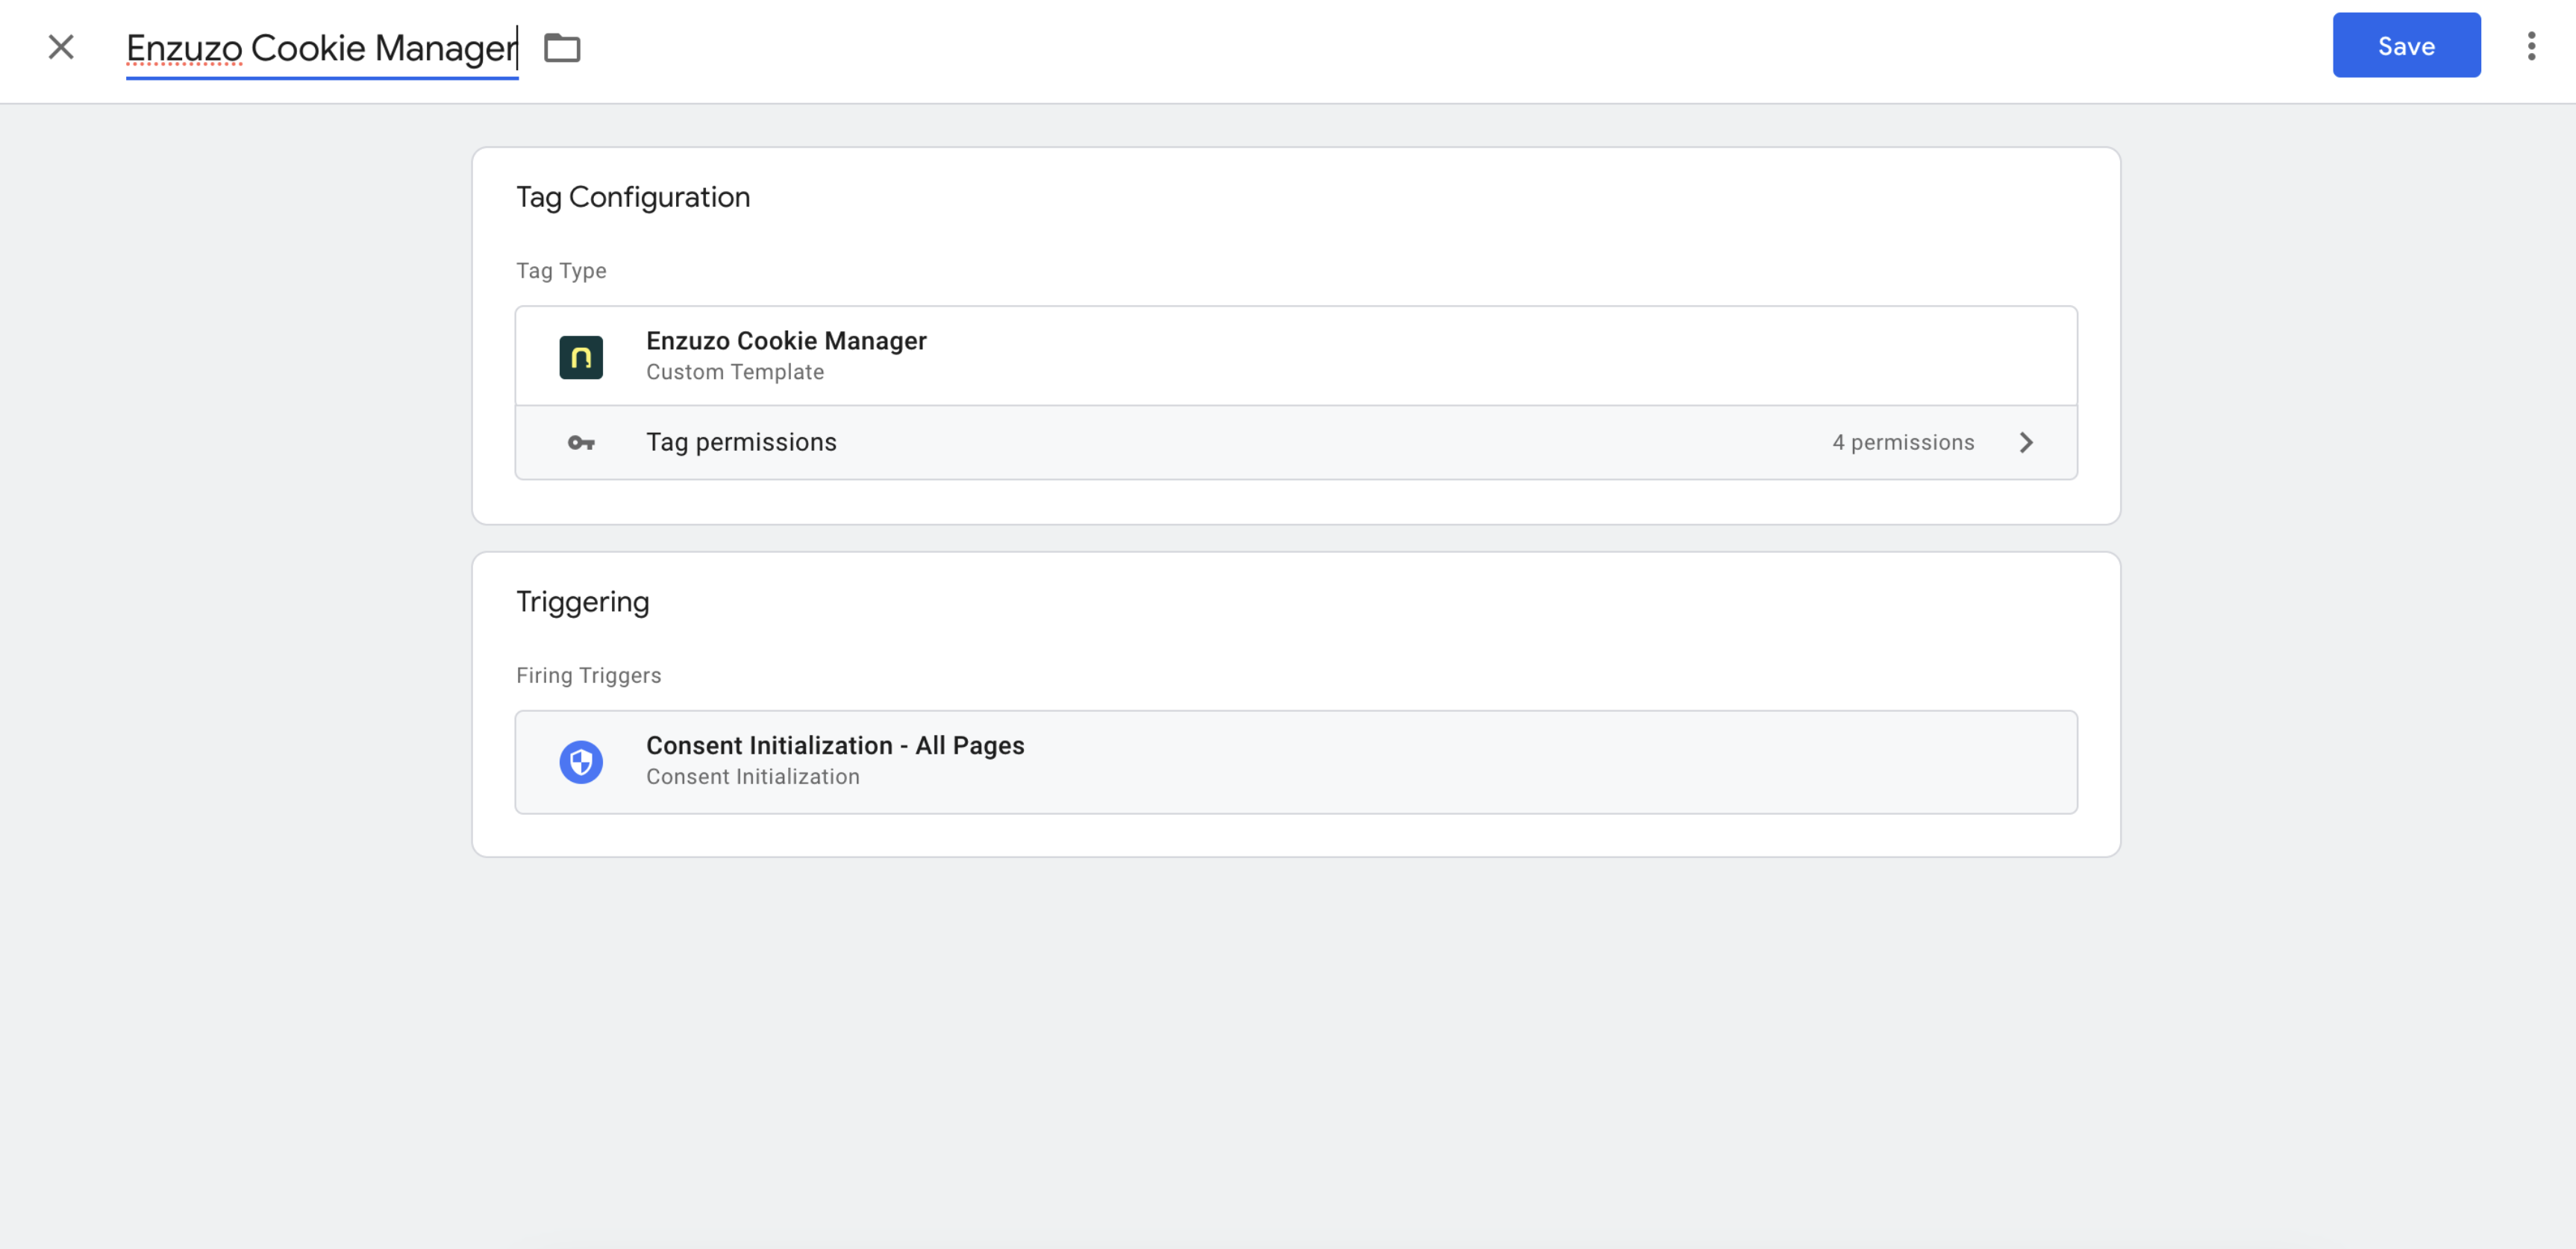
3. Click on "Tag Configuration" and fill in the value for "Enzuzo Script URL". You can find the correct URL under "Cookie Consent" > "Cookie Banner" > "Add To Site".
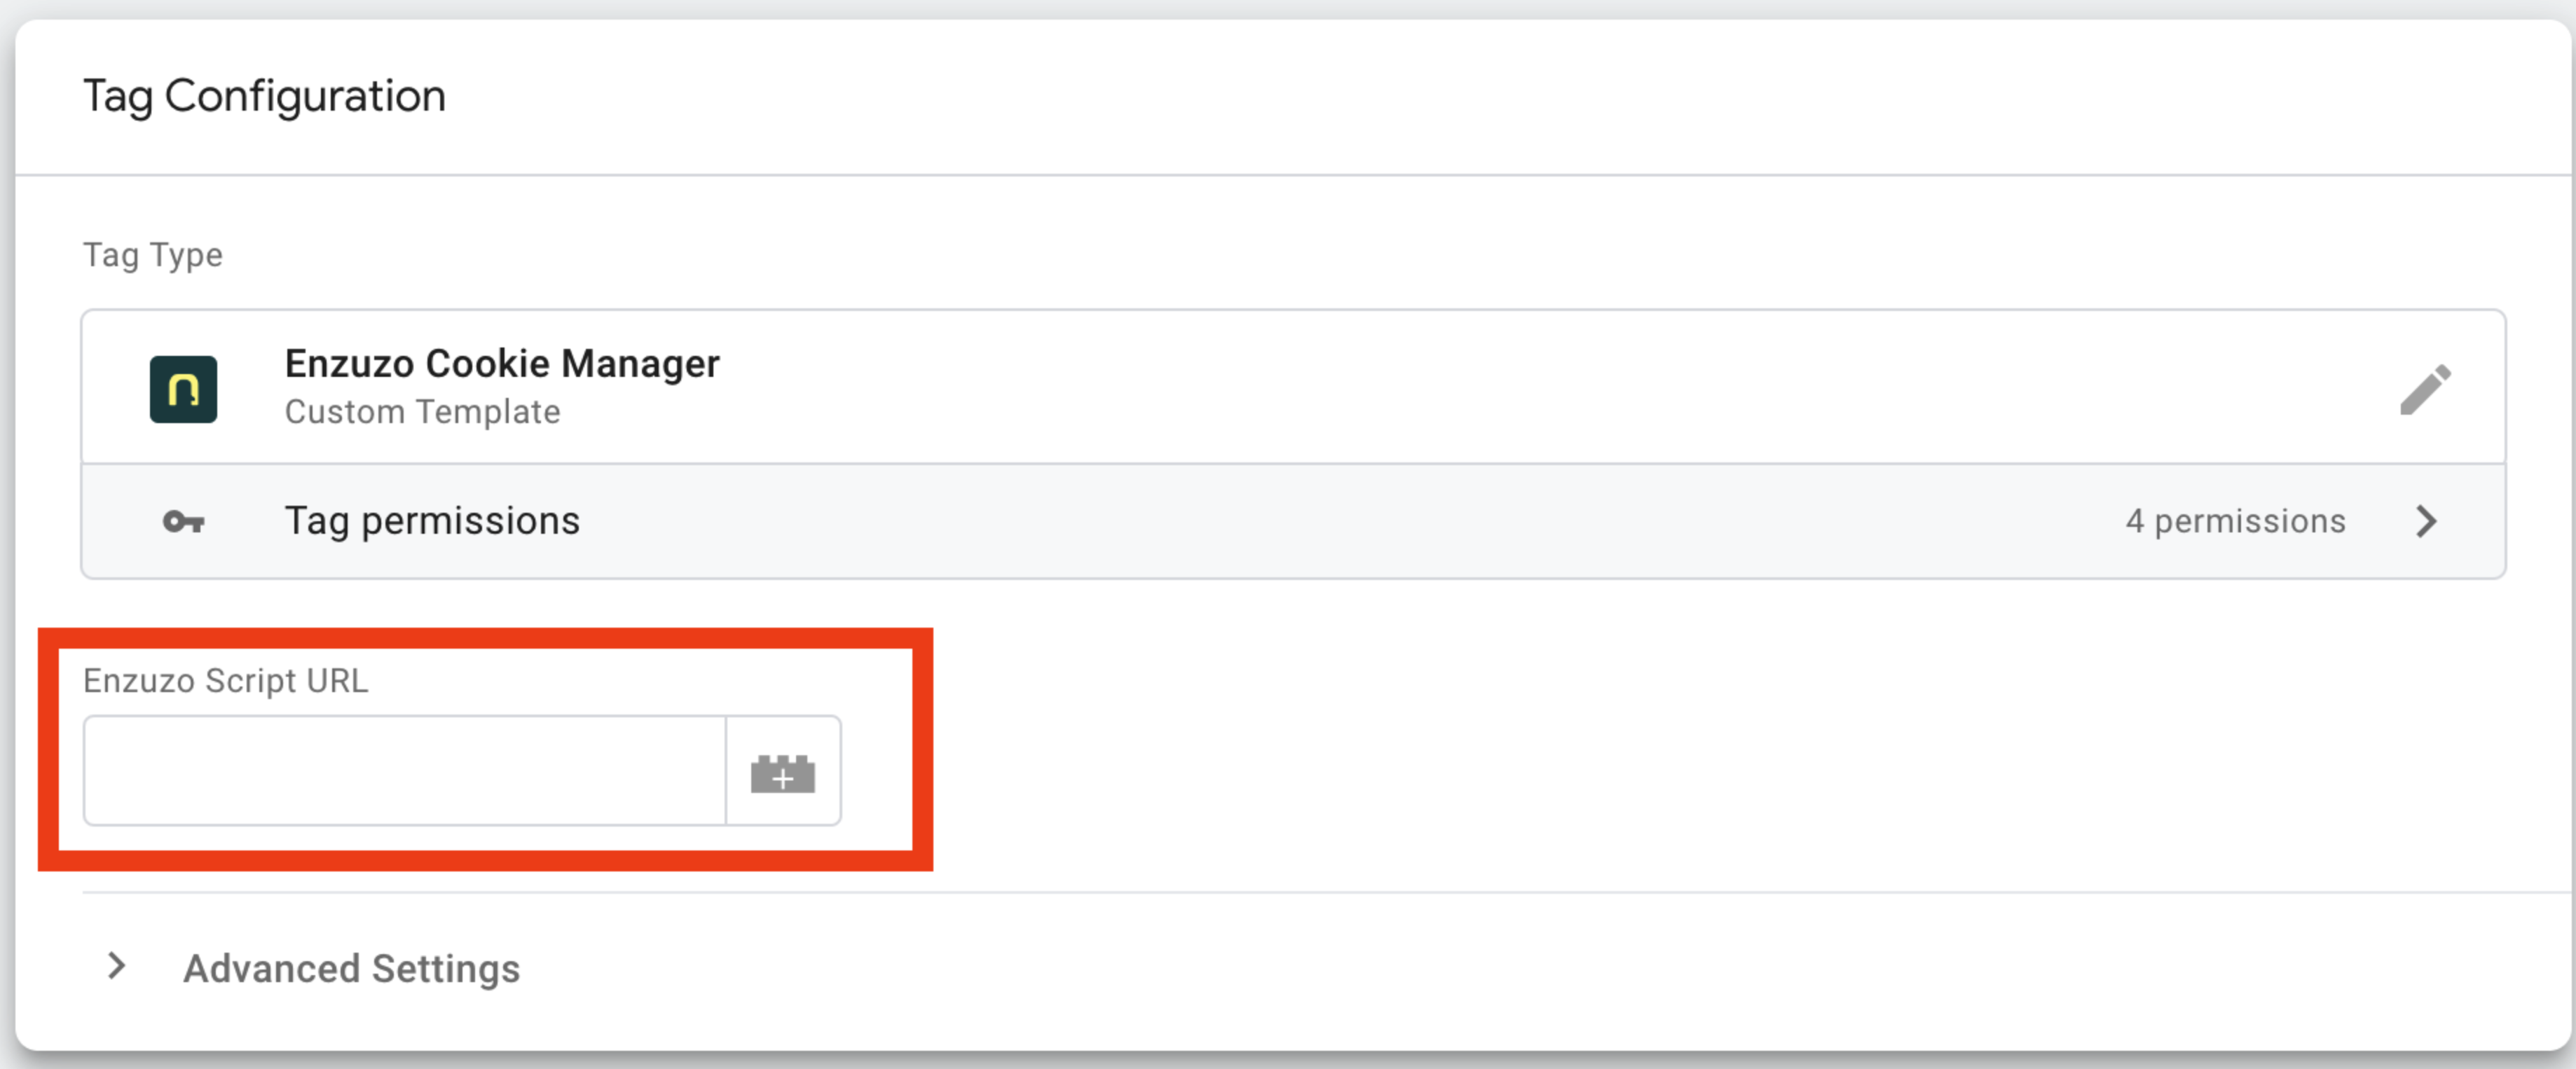
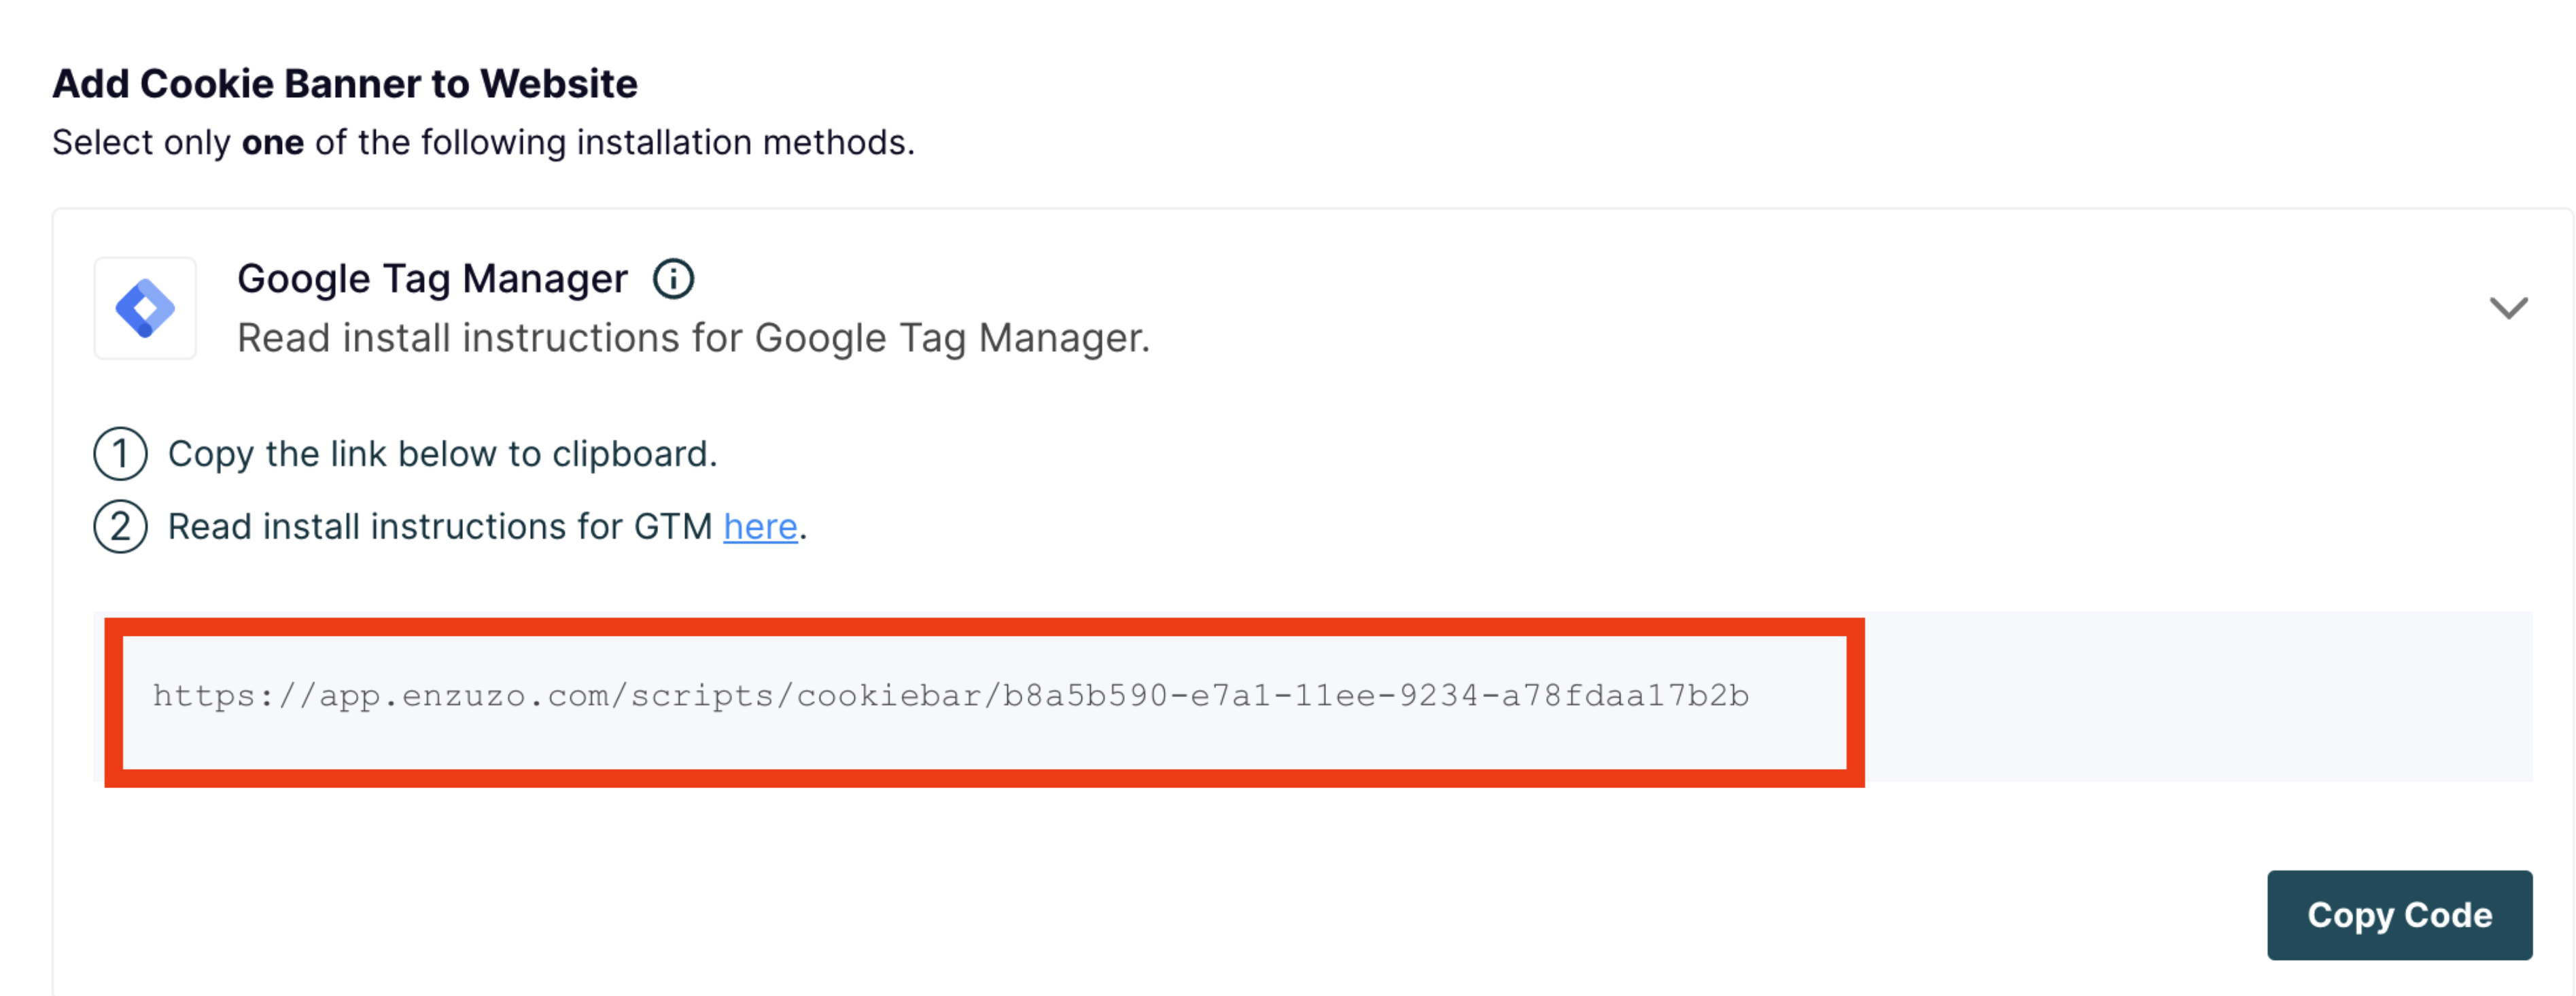
4. Finally, press "Save" on your tag, and then publish your workspace.
Configure Third Party Scripts
Native tags built by Google automatically integrate with the Google Consent Mode signals our banner sends. However, if you are loading a tag from a third-party vendor, such as Hotjar or Microsoft Analytics, you will need to configure it to integrate with Google Consent Mode.
First, create a "Custom Event" trigger, by going to "Triggers" > "New" > "Custom Event". In the "Event Name" field, type "enzuzo_consent_update".
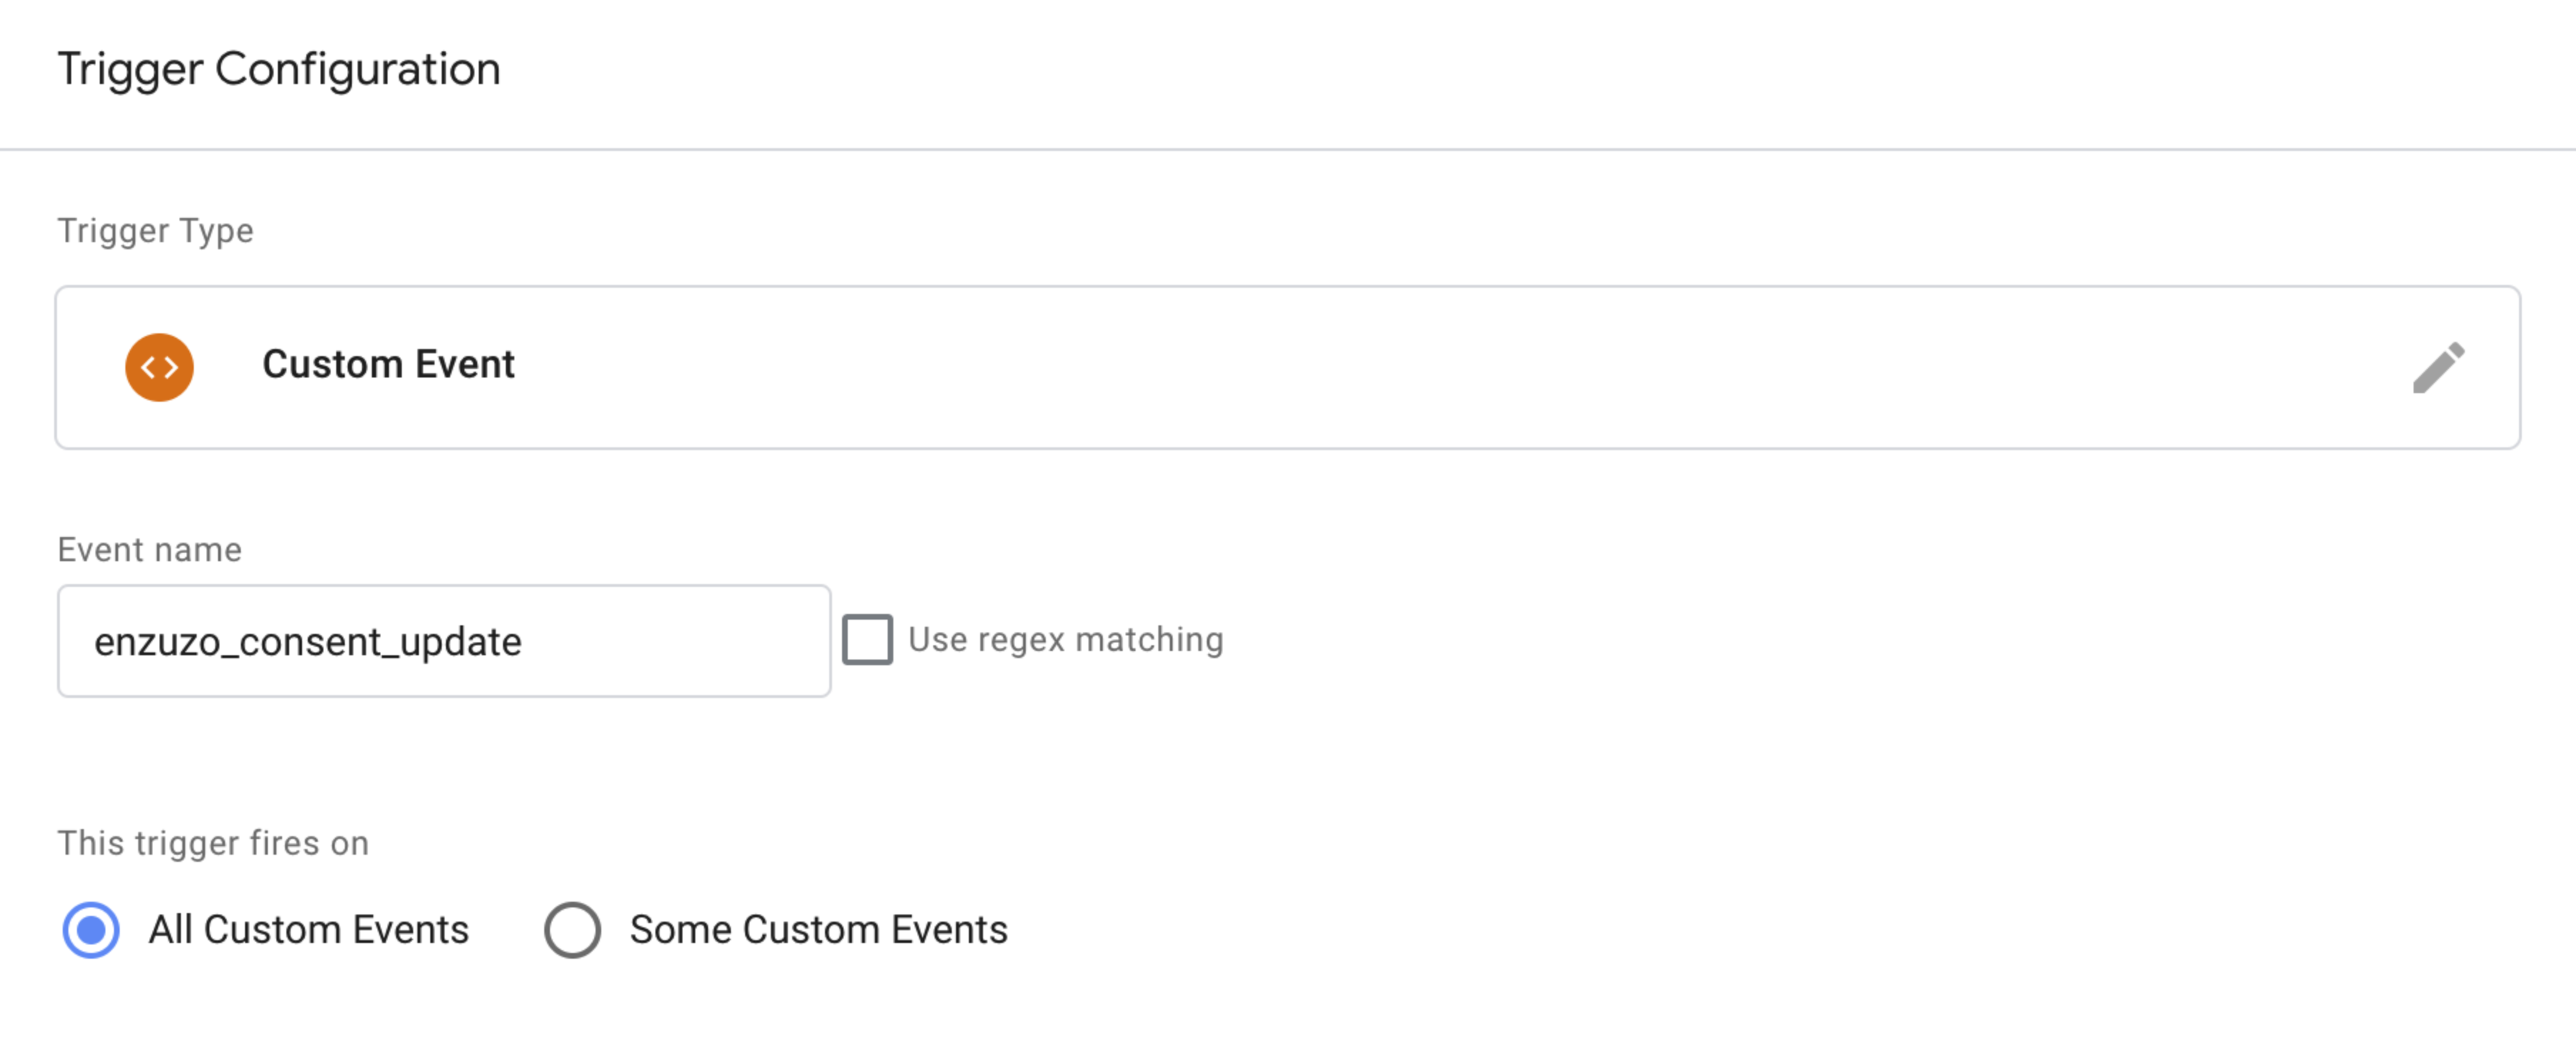
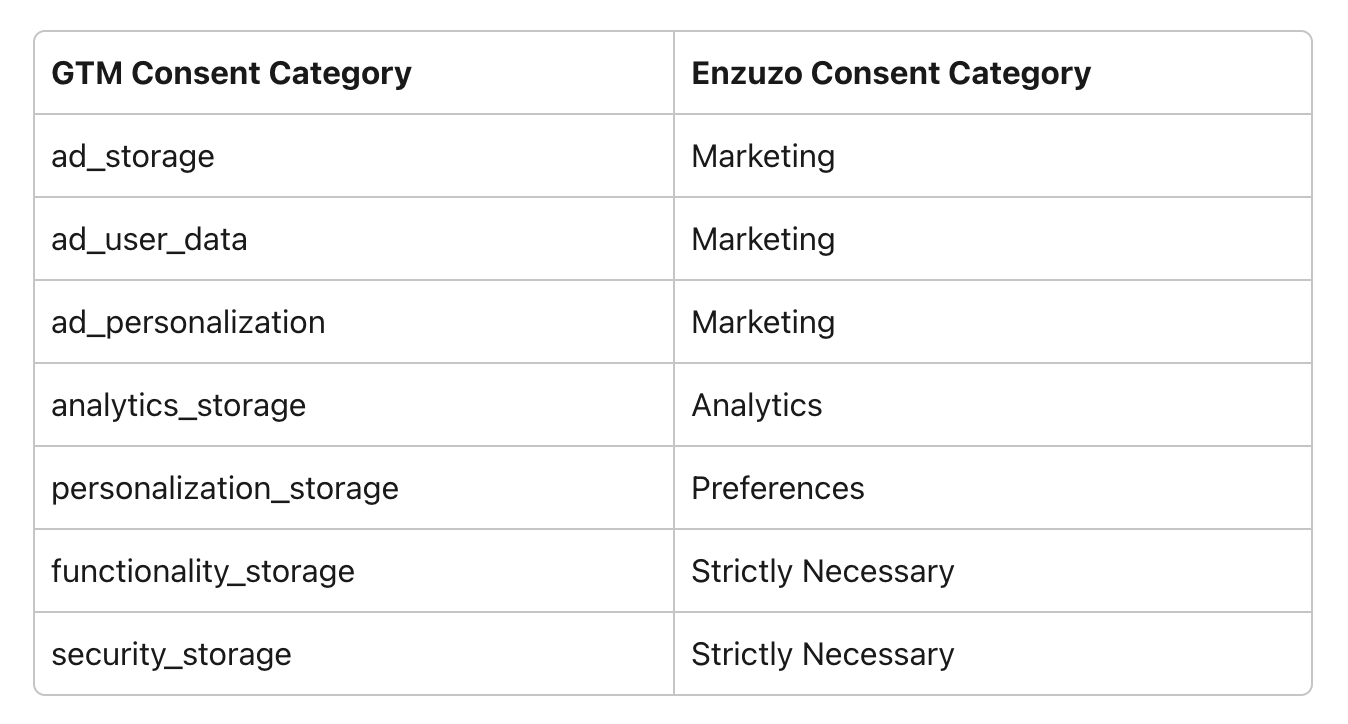
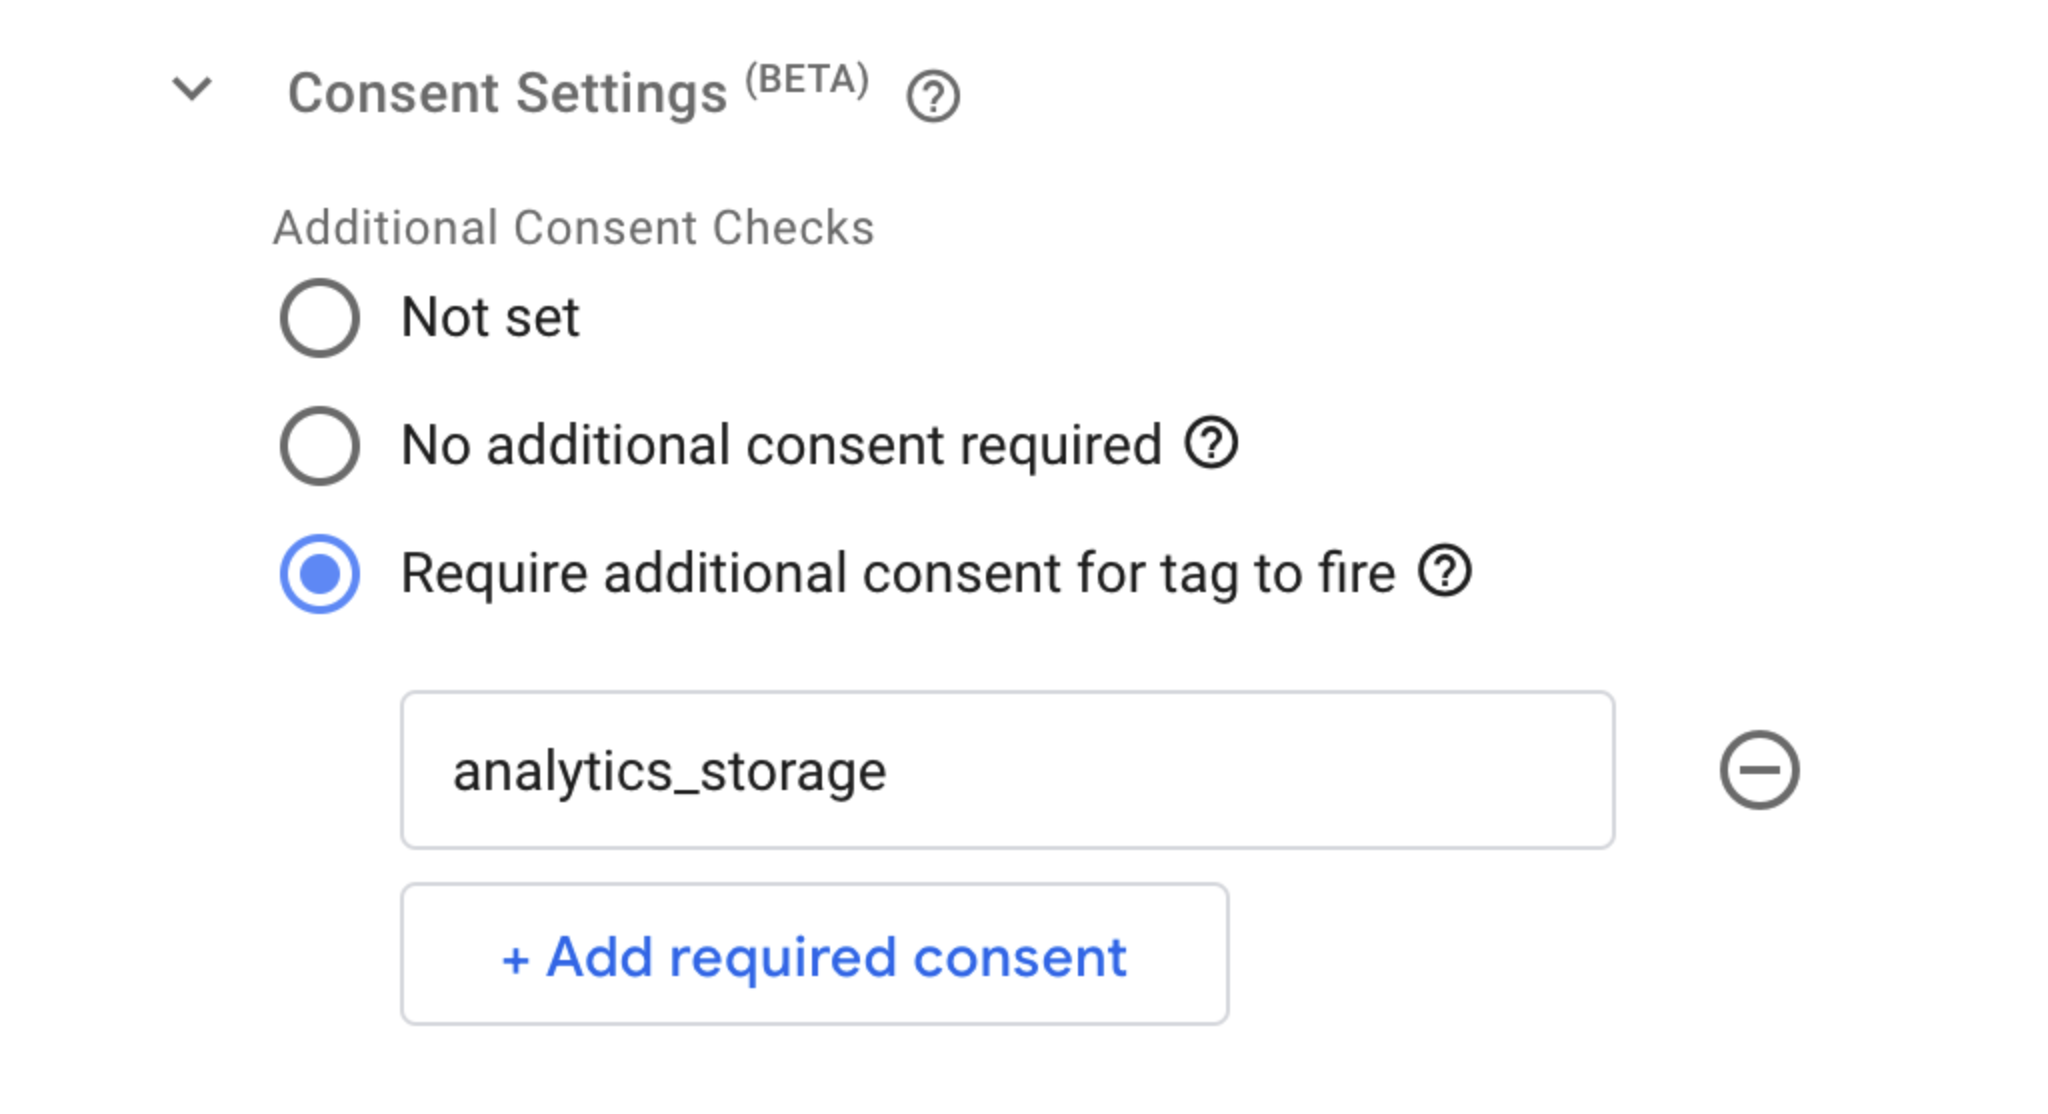
When creating your custom tag, use the new "Custom Event" trigger you created. Then, click on "Advanced Settings" > "Consent Settings" > "Require additional consent for tag to fire", and then specify a category. Your tag will then fire when the user consents to the corresponding category in the Enzuzo Cookie Banner.
👉 Need Expert Help or Advice? Reach out to us in Live Chat or Book a Demo!


